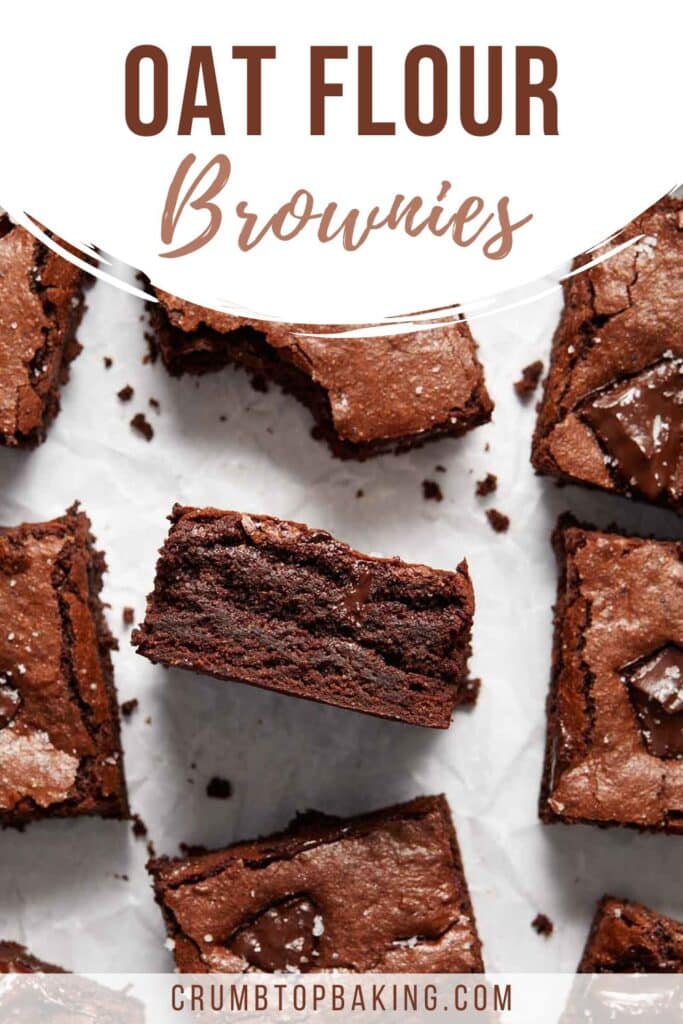
These gluten-free Oat Flour Brownies are dense and fudgy with melted dark chocolate, chopped chocolate and cocoa powder. The oat flour makes these brownies naturally gluten-free, and you can use store-bought or homemade oat flour. I’ve tested both!
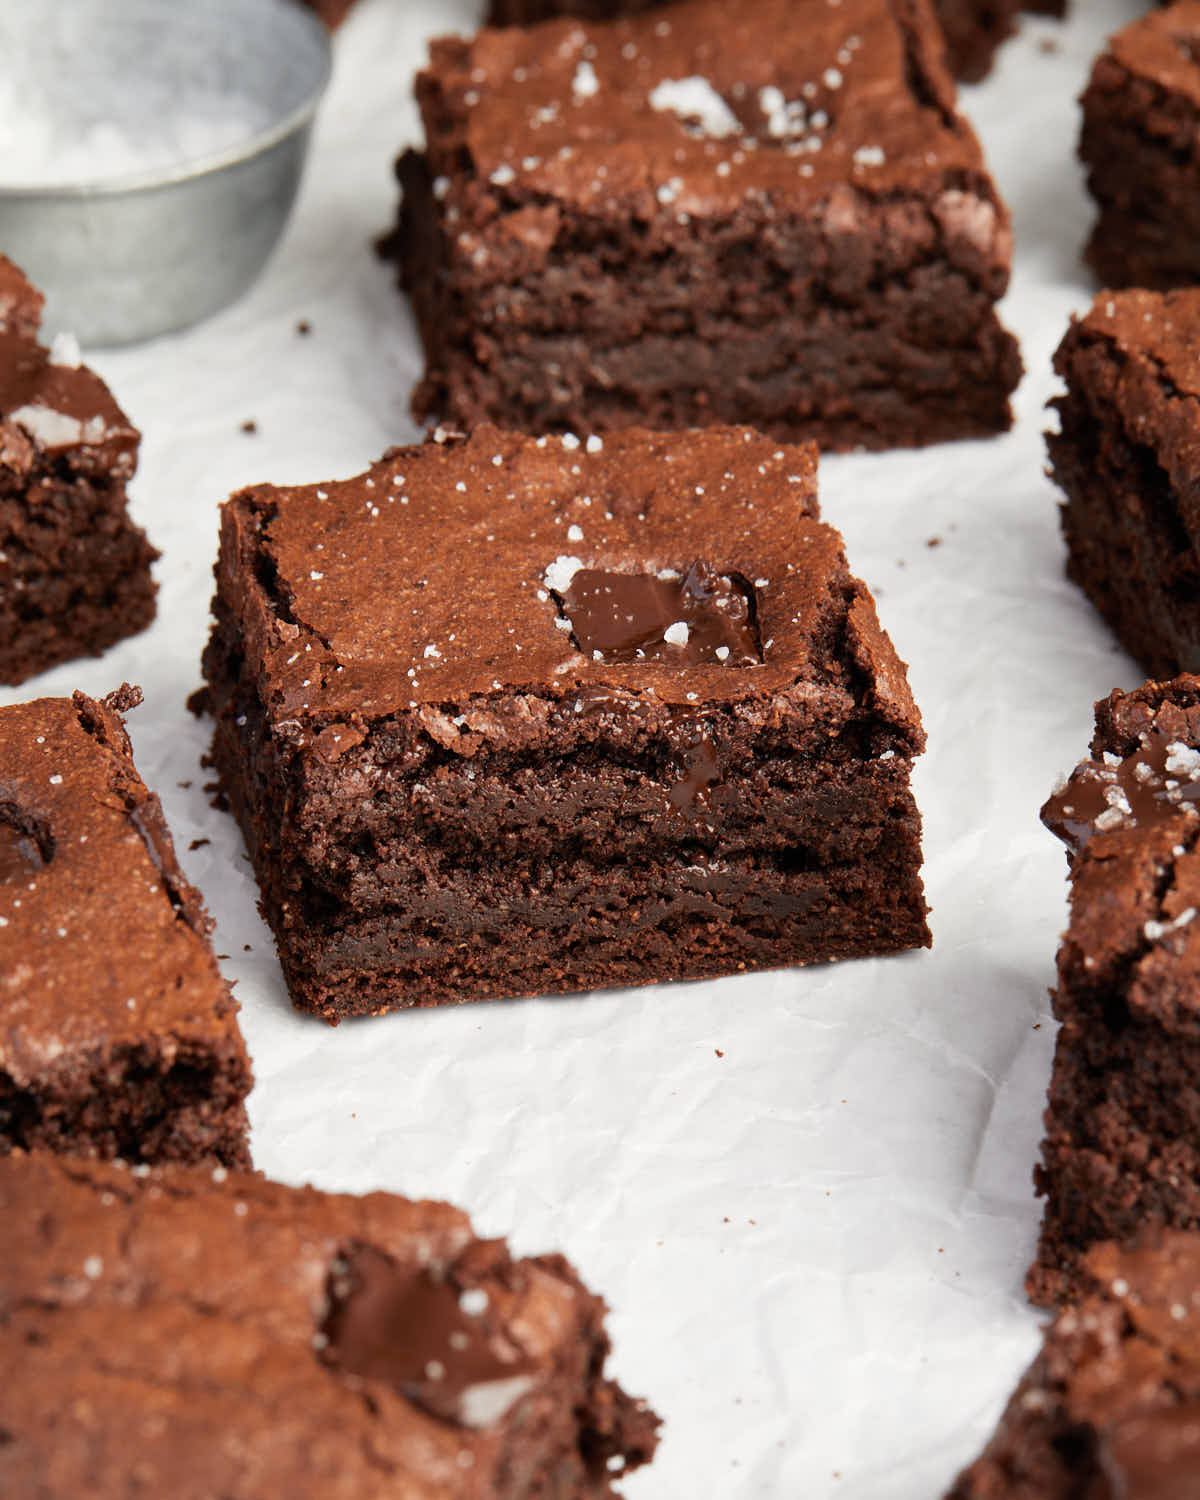
Sometimes oat flour can make baked goods a little crumbly, but I guarantee there is nothing crumbly about these brownies. They’re chocolatey, moist and fudgy, with some extra dark chocolate folded into the batter for good measure!
After you try these brownies, you’ll want to add these oat flour cookies with chocolate chips and peanut butter to your baking list too!
Details on a few ingredients
Below is a quick overview of some of the key ingredients for these brownies. For the full list of ingredients and the quantities used, please see the recipe card at the end of this post.
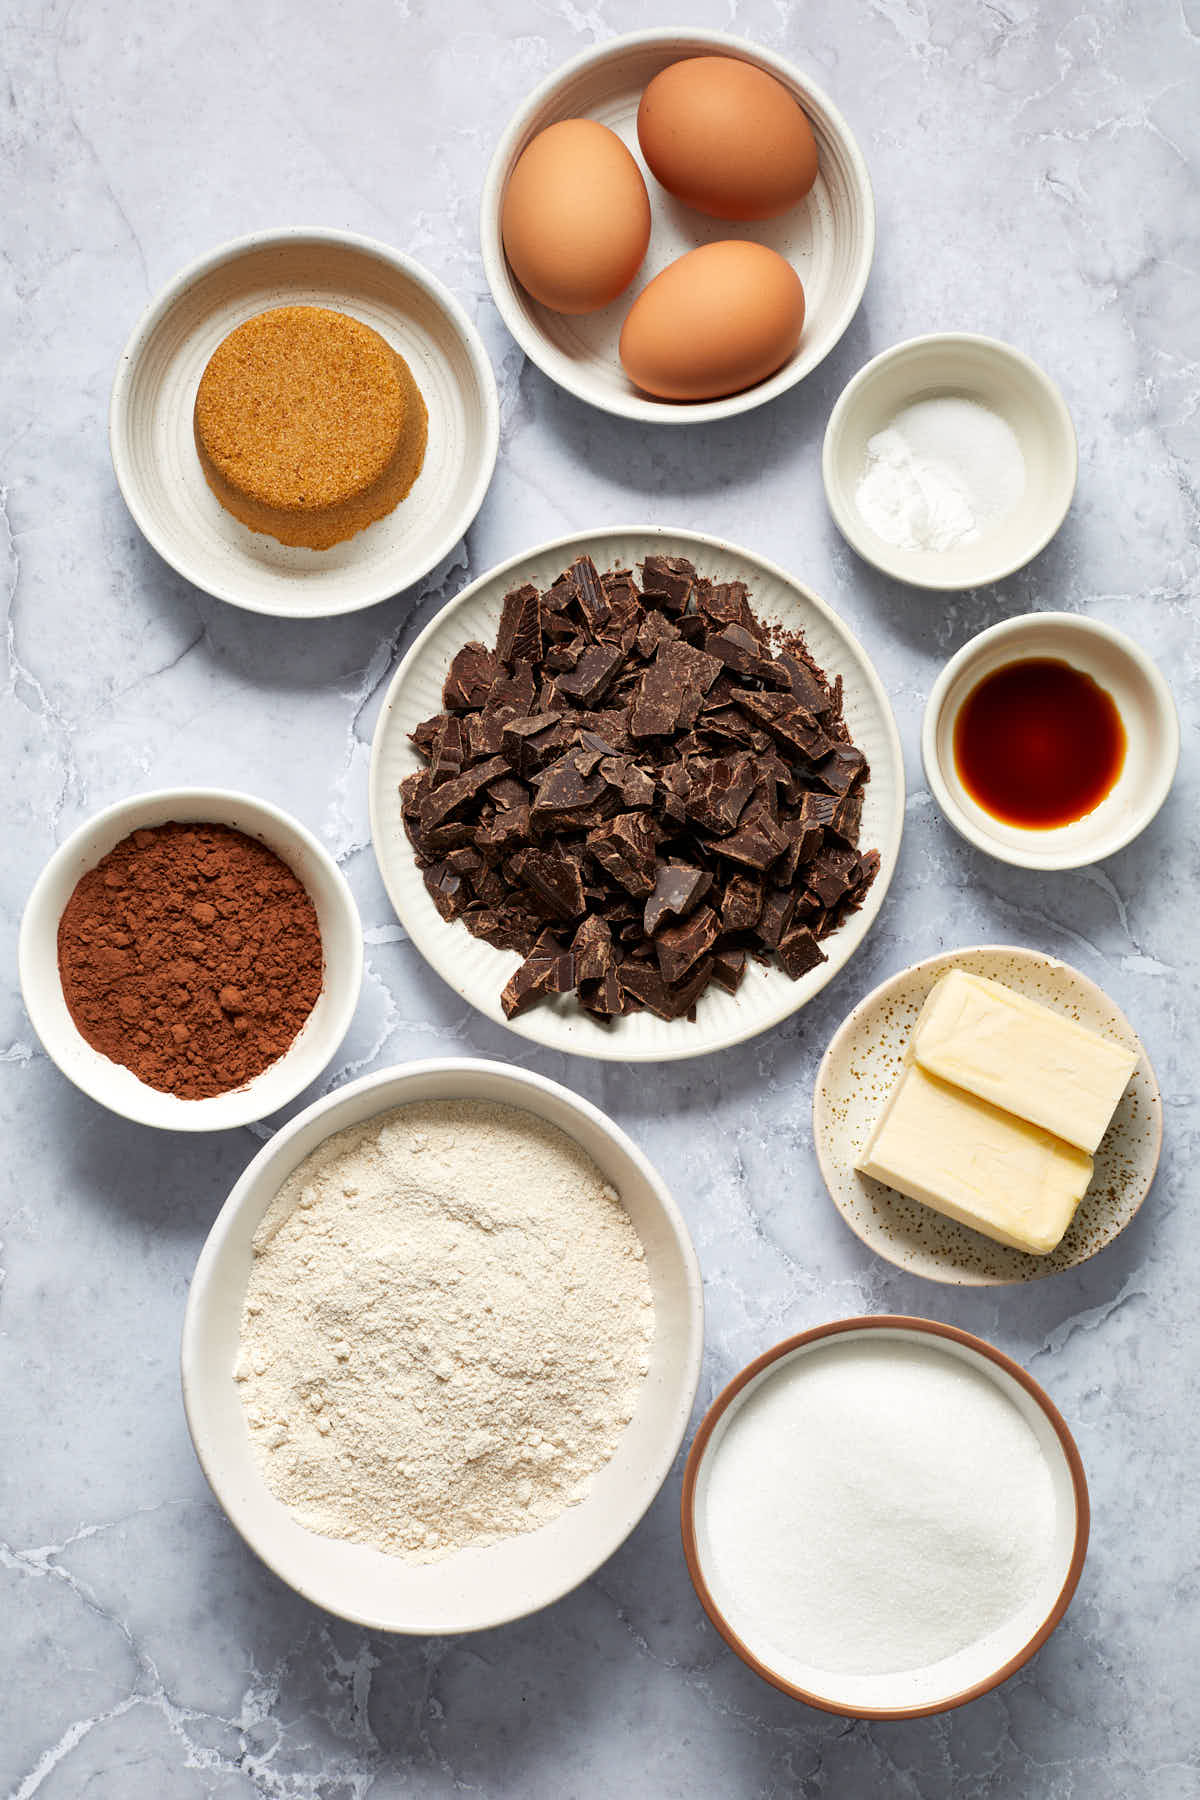
- Oat flour – You’ll want to make sure you’re using finely ground oat flour. I’ve tried a few different brands, and some are finer than others. Quaker Oats is usually my go-to brand. (Not sponsored, just a fan). You can also make your own oat flour by grinding oats in a blender or food processor until you get a flour-like consistency.
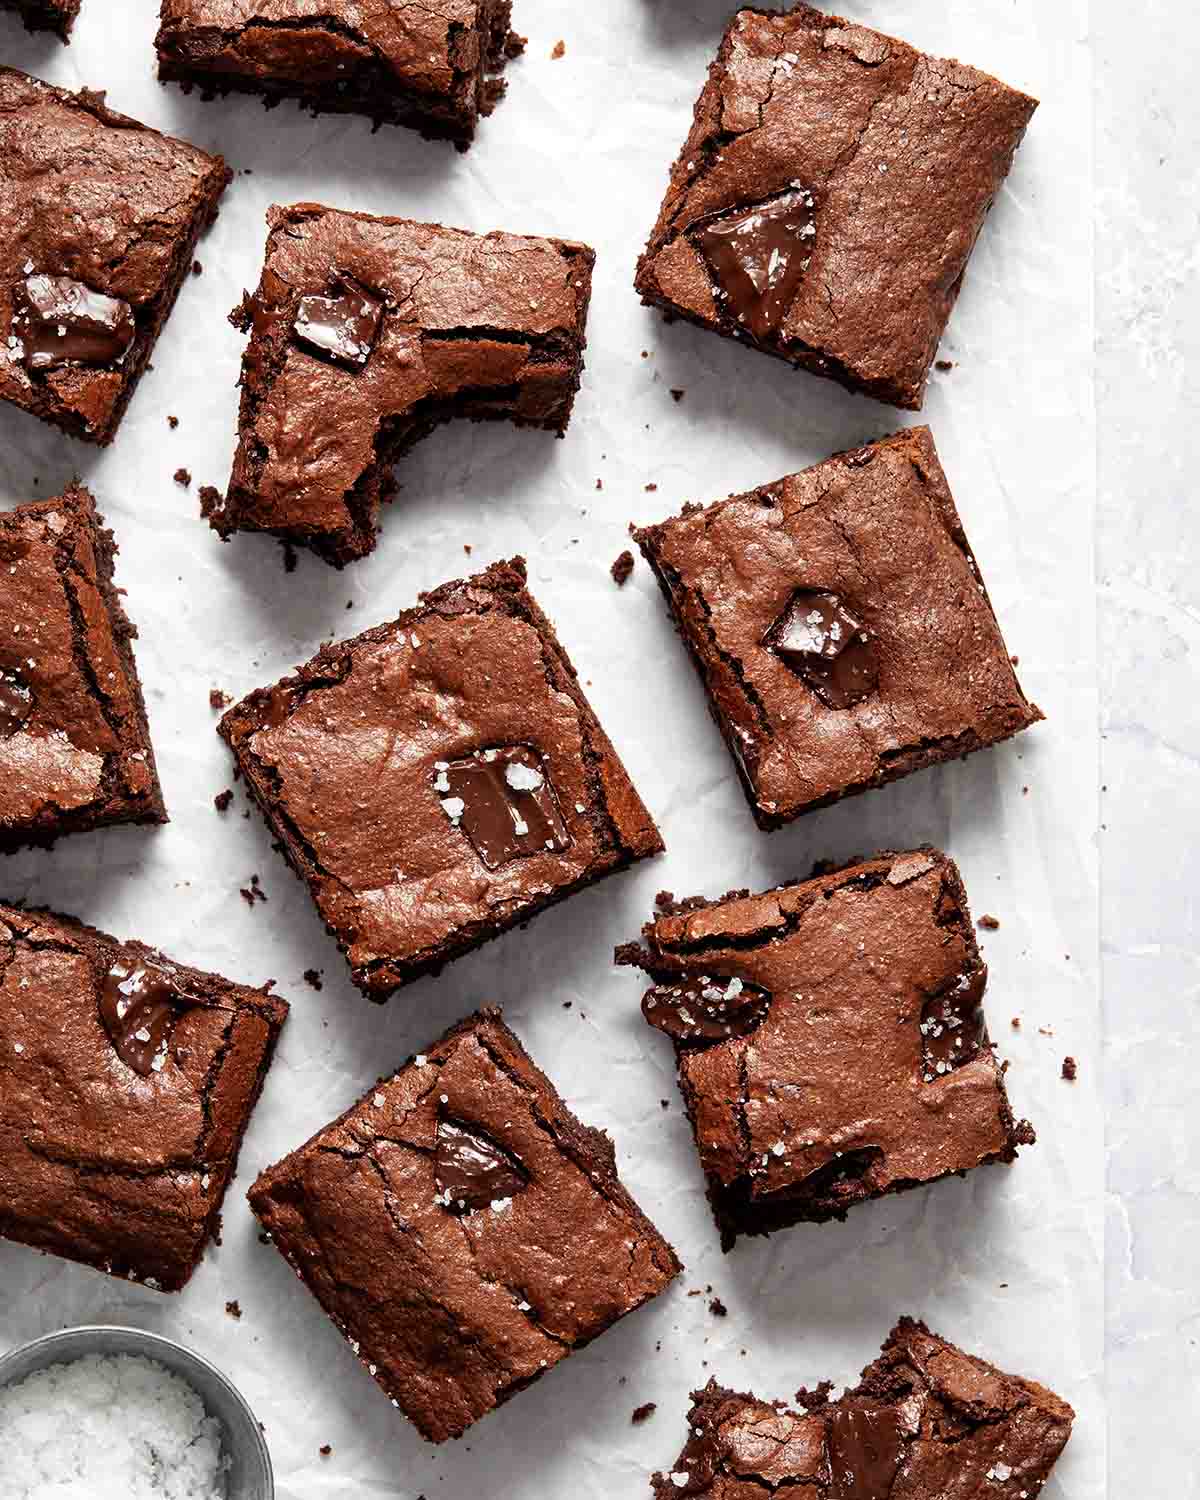
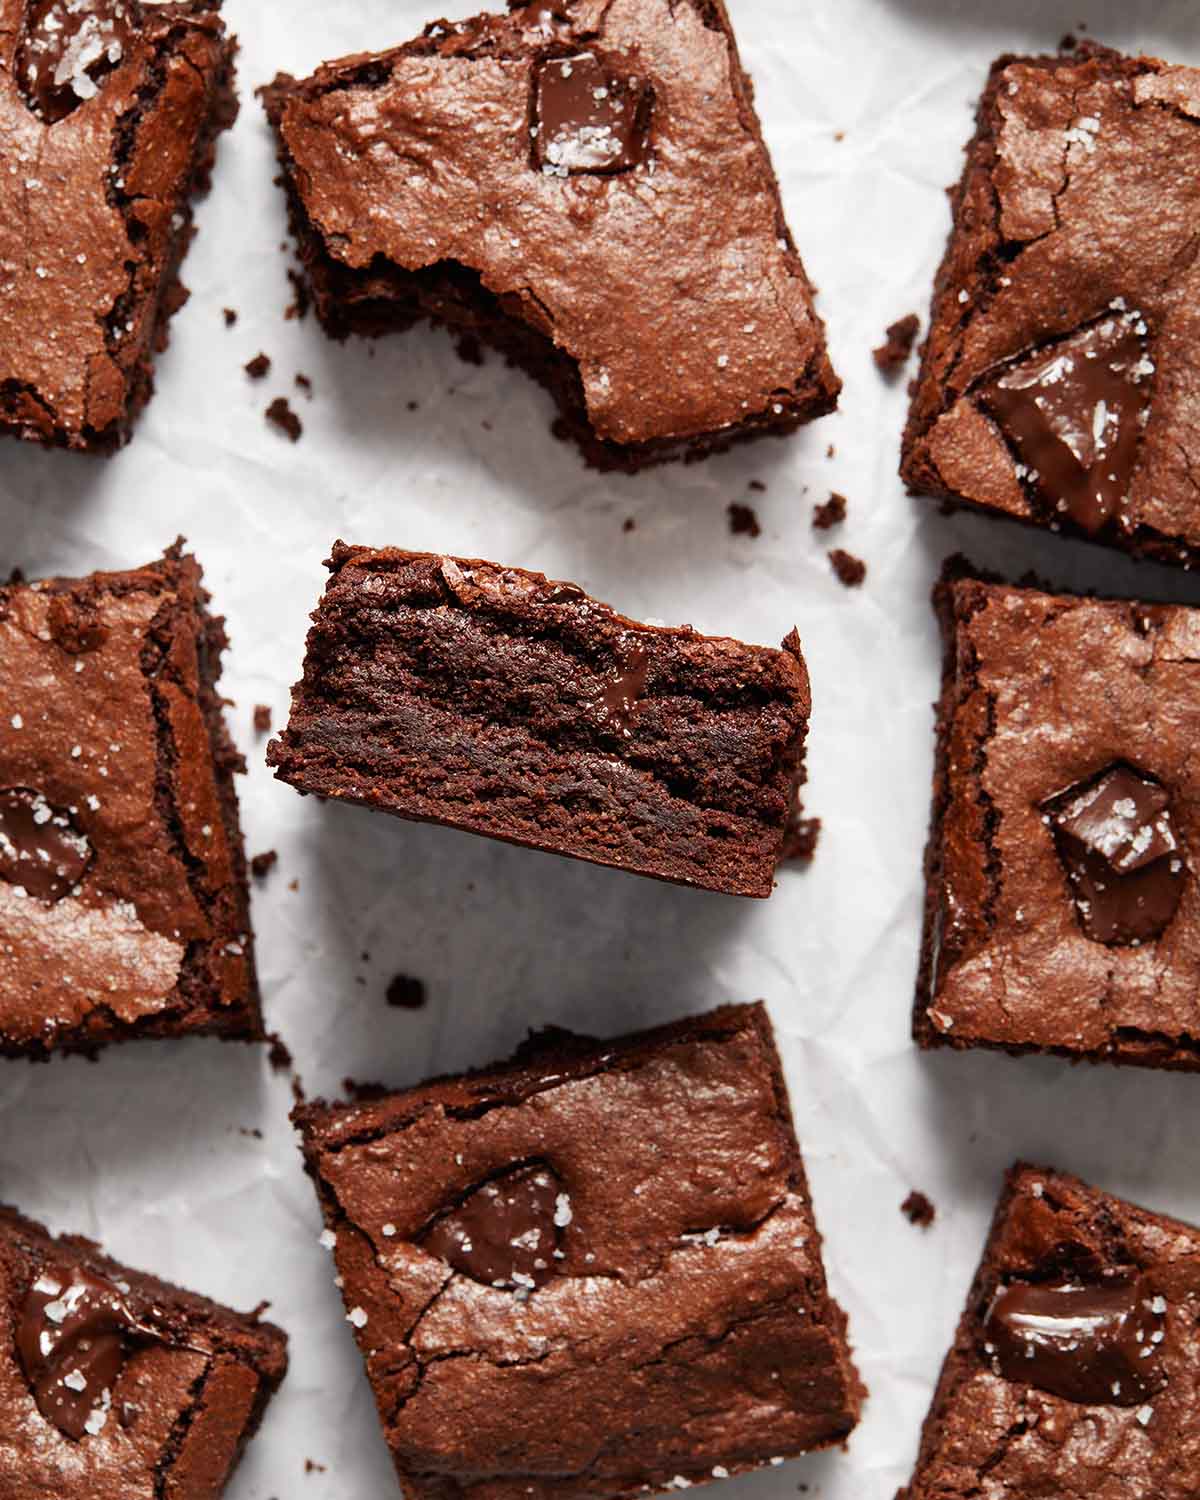
- Dark chocolate – The rich brownie batter starts with melted chocolate and butter. For an ultra rich flavour, I used extra dark chocolate (70% cacao). Try to use a high quality chocolate and make sure it’s gluten-free. You’ll also want extra chocolate chopped up to go into the batter to add to the fudgy texture.
- Sugars – The recipe calls for a mix of granulated sugar and brown sugar. I like to use a mix as the granulated sugar helps add a thin crust on top of the brownies and the brown sugar adds depth of flavour and moisture.
- Cocoa – These brownies are made with Dutch-processed cocoa, which has a darker colour and more intense chocolate flavour compared to natural cocoa.
How to make gluten-free brownies with oat flour
This recipe is similar to most brownie recipes, it’s just made with gluten-free oat flour instead. There are no special ingredients, no special process and no special equipment!
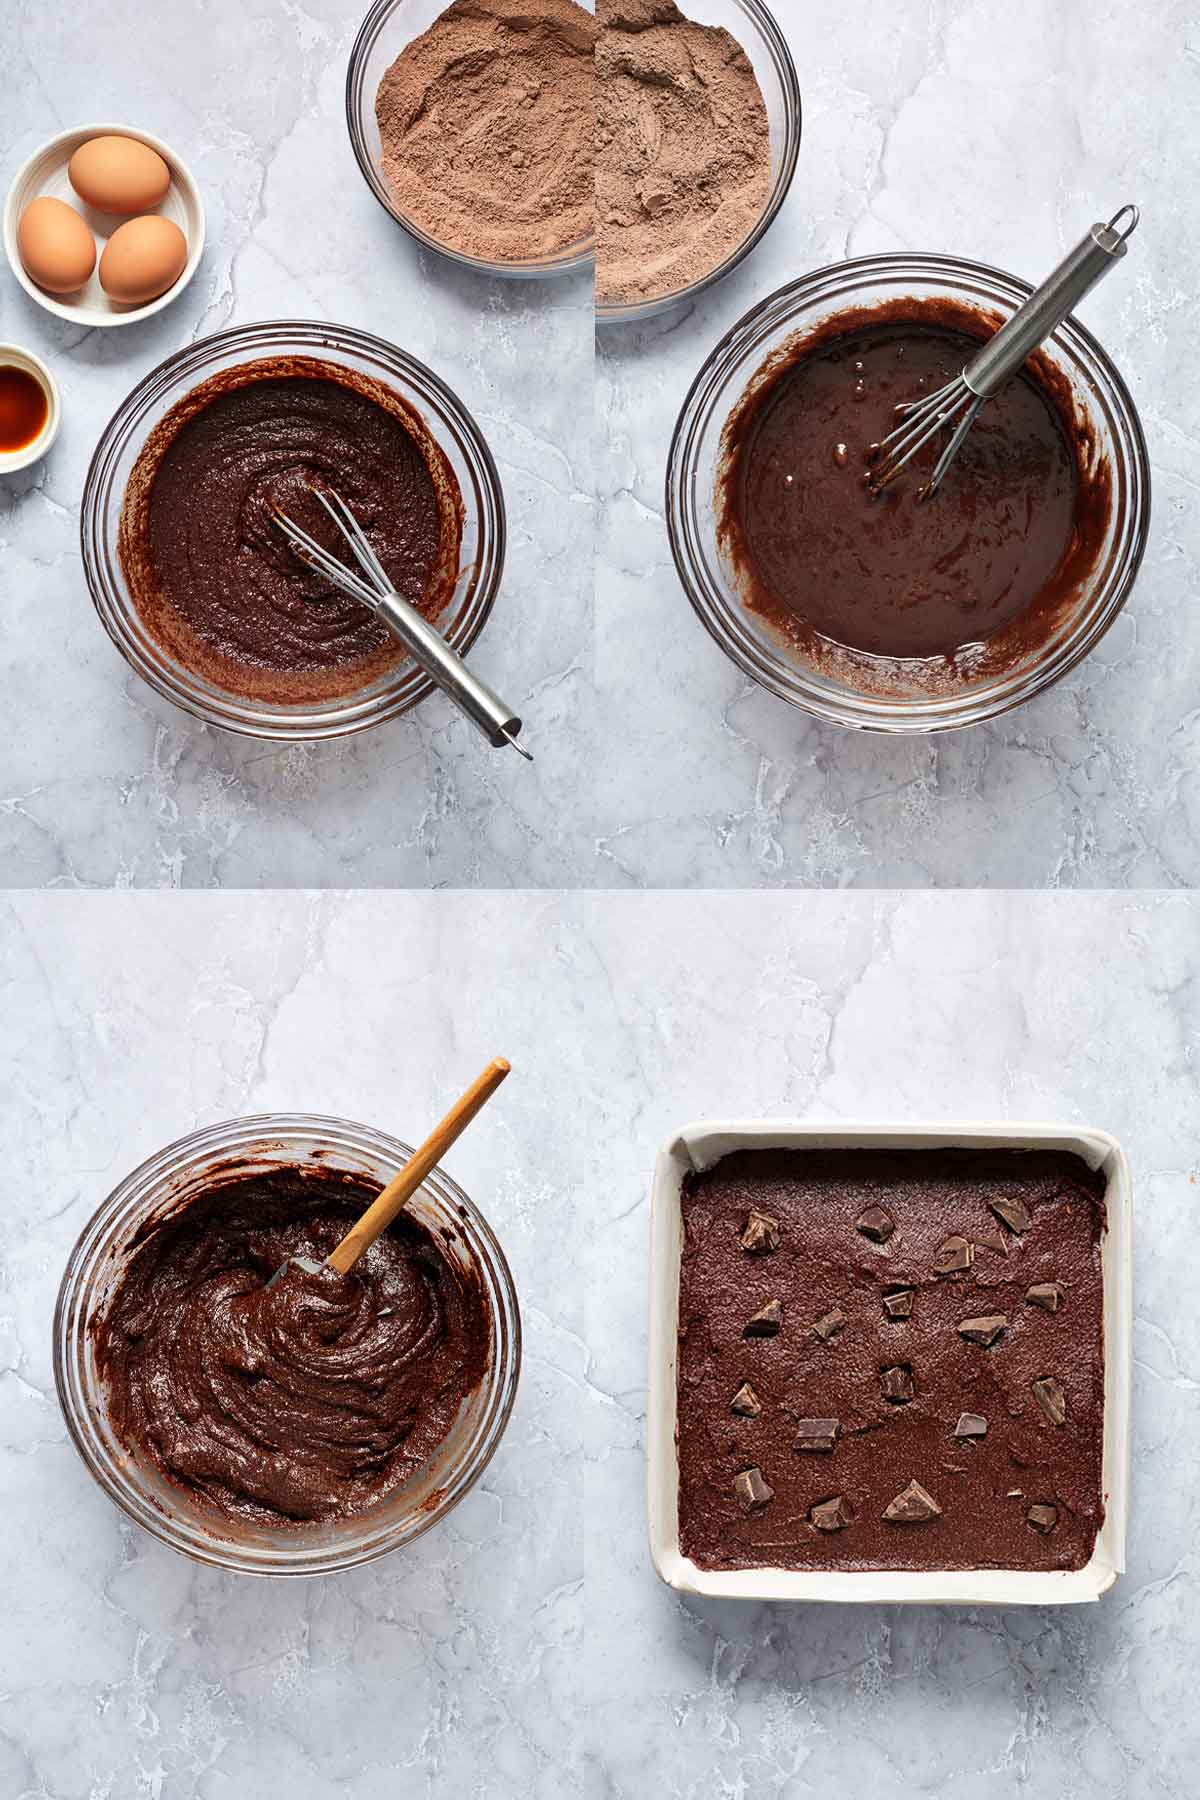
First, whisk together the flour, cocoa, baking powder and salt and set aside. (If your cocoa and/or flour are lumpy, you may wish to sift the dry ingredients together).
In a large microwave safe bowl, melt together the chocolate and butter. You can also do this using a double boiler on the stovetop.
Whisk in the sugars and let cool for about 5 minutes. Then, whisk in the eggs (one at a time) and vanilla.
Add the dry ingredients to the wet mixture and stir until just combined. The batter will be thick. Make sure the dry ingredients are incorporated but be careful not to over mix.
Fold in some more chopped dark chocolate (reserving some for the top).
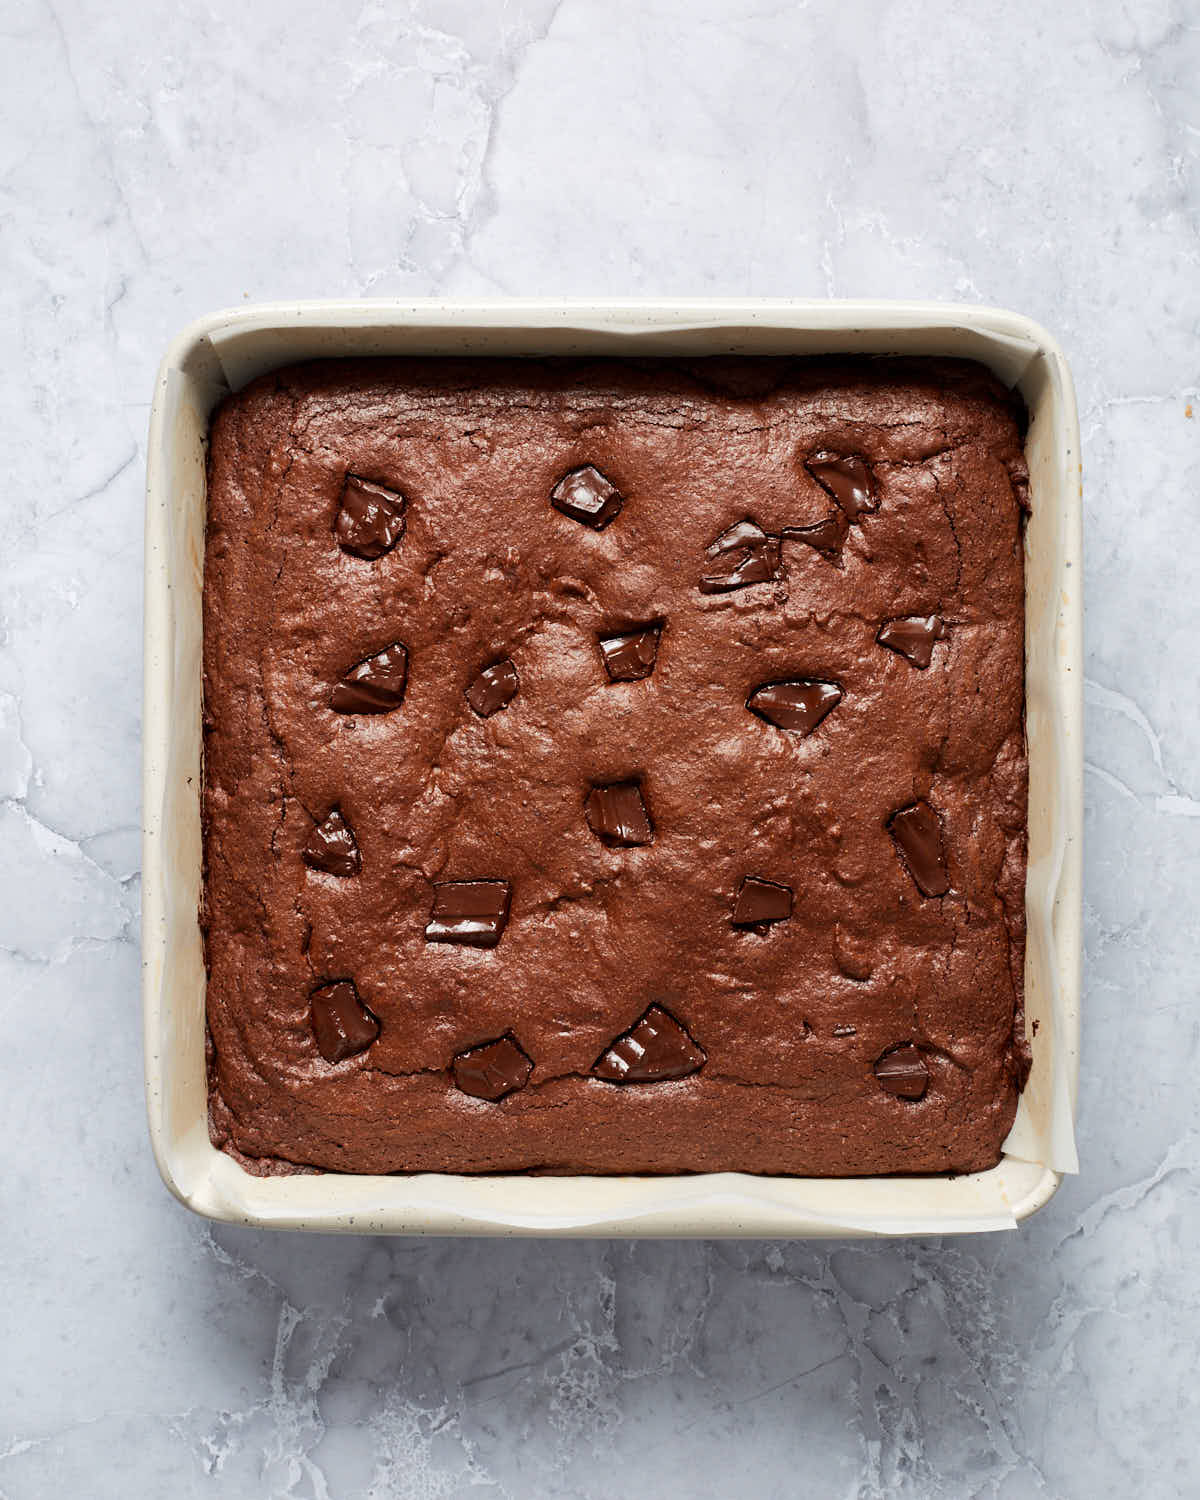
Spread the batter out in a 9-inch square pan lined with overhanging parchment paper and top with remaining chopped chocolate.
Bake at 350F for 28-32 minutes, or until a toothpick inserted into the brownies comes out almost clean.
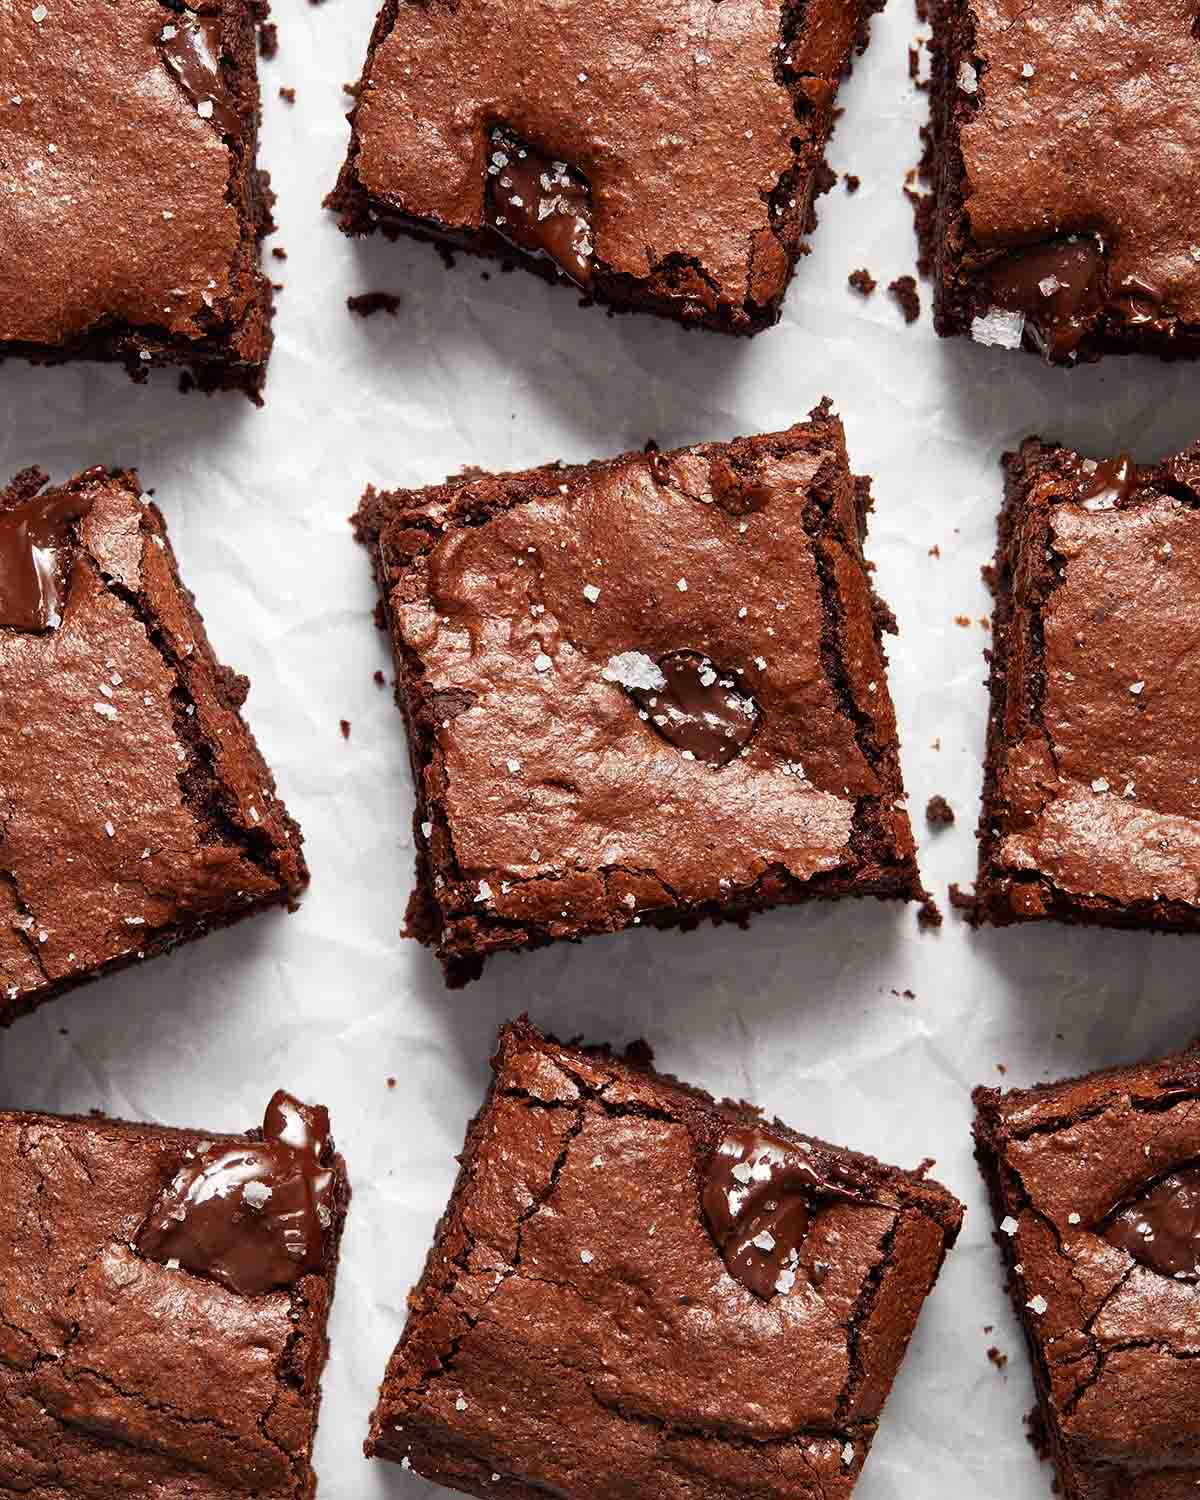
Sprinkle on a little flaky sea salt (optional) while the brownies are still warm. Let cool and cut into squares.
Storage tips
Oat flour brownies are best stored in an airtight container at room temperature for 1-2 days. To keep them a little longer, you can store them in the fridge for 3-5 days. (Just note that this will firm up the brownies and make them a bit chewy, so I prefer them kept at room temperature).
You can also freeze these brownies in a freezer safe container for up to one month and just thaw at room temperature before serving.
Oat flour brownies FAQs
Yes, oat flour is naturally gluten-free, but since cross contamination can happen, make sure the flour you’re using is labelled certified gluten-free.
Yes, you can use 140 grams of all purpose white flour in place of the oat flour. (Just keep in mind that the brownies will no longer be gluten-free).
Yes, I’ve made this recipe with both store-bought and homemade oat flour. If you’re using homemade, just make sure the oats are finely ground. (I’ve found this is best achieved with a high-powered blender or food processor).
For a rich chocolatey flavour, I prefer to use Dutch-processed cocoa for this recipe. It has a more intense flavour and is not as bitter as natural cocoa. This recipe hasn’t been tested with natural cocoa.
Yes, for a thicker brownie, you can use an 8-inch square pan. Just increase the baking time by about 5 minutes.
Key recipe tips
- Measurements in grams. For greater accuracy, I included weighted measurements in this recipe. If you’re using cup measurements, be sure to use the spoon and level method for the flour and cocoa. Scooping them out of the bag or container will pack them into your measuring cup and result in too much flour and/or cocoa for the recipe.
- Melting chocolate. To keep things easy, I normally melt the chocolate and butter together in the microwave. As chocolate can burn easily, I do this in 30-second intervals, stirring in between each interval, until the chocolate and butter are melted together and smooth. You can also use a double boiler on the stovetop instead of the microwave.
- Let melted chocolate mixture cool. After the sugars are whisked into the melted chocolate and butter mixture, let it cool for 5 minutes before adding the eggs.
- Room temperature eggs. To ensure the eggs incorporate well into the melted chocolate mixture, bring them to room temperature first.
- Gluten-free ingredients. While oat flour is naturally gluten-free, cross contamination can happen, so make sure it’s labelled certified gluten-free. You’ll also want to make sure your chocolate and cocoa are gluten-free.
- Variations. Feel free to leave out the chopped chocolate that’s added to the batter, or replace it with chocolate chips or chopped nuts. (If you leave out the chopped chocolate in the batter, you may need to reduce the baking time by 1-2 minutes).
- Let cool before cutting. Letting the brownies cool will give them time to set up and make them easier to cut into squares.
More brownie recipes
If you make this recipe, I’d love to hear what you think in the comments below!
HUNGRY FOR MORE? Follow Crumb Top Baking on Instagram, Pinterest and Facebook!

Oat Flour Brownies
Ingredients
- 1 1/3 cup (140 g) oat flour
- 1/3 cup (35 g) Dutch-processed cocoa
- 1/2 teaspoon baking powder
- 1/2 teaspoon fine sea salt
- 6 ounces (170 g) extra dark chocolate (70% cacao), chopped
- 1/2 cup (113 g) unsalted butter
- 1 cup (210 g) granulated sugar
- 1/2 cup (105 g) dark brown sugar, packed
- 3 large eggs, room temperature
- 1 teaspoon vanilla extract
- 3 ounces (85 g) extra dark chocolate, chopped
- flaky sea salt, optional
Instructions
- Preheat oven to 350F. Grease and line a 9-inch square baking pan with overhanging parchment paper.
- In a medium-sized bowl, whisk together the flour, cocoa, baking powder and salt and set aside. (If your cocoa and/or oat flour are lumpy, you should sift the dry ingredients together).
- In a large microwave safe bowl, add 6 ounces of dark chocolate and the butter. Microwave on 30 second intervals, stirring in between each interval, until the chocolate and butter are melted together and smooth.
- Whisk in the sugars and let cool for 5 minutes. Then, whisk in the eggs (one at a time) and vanilla.
- Stir the dry ingredients into the wet mixture. Make sure the dry ingredients are incorporated but be careful not to over mix. The batter will be thick.
- Fold in the remaining 3 ounces of chopped dark chocolate (reserving some for the top).
- Spread out the batter evenly in the prepared pan and top with reserved chocolate.
- Bake for 28-32 minutes, or until a toothpick inserted into the brownies comes out with just a little bit of batter on it.
- While the brownies are still warm sprinkle some flaky sea salt over the top (optional).
- Let cool on a wire rack before cutting into squares and serving.
Notes
- You can use store-bought or homemade oat flour, just make sure it is finely ground.
- You can use a double boiler on the stovetop to melt the chocolate and butter together if you don’t want to use the microwave.
- For this recipe, weighted measurements are included to ensure greater accuracy. If you’re using cup measurements, be sure to use the spoon and level method for the flour and cocoa.
- Letting the chocolate mixture cool for 5 minutes before adding room temperature eggs will ensure the eggs whisk into the batter easily.
- While oat flour is naturally gluten-free, cross contamination can happen, so make sure it’s labelled certified gluten-free. Also make sure your chocolate and cocoa are gluten-free.
Nutrition Facts per Serving
Disclaimer
Nutrition information is an estimate only and will vary depending on the substitutions made and the brands used.
Did you make this recipe or have any questions?
I love reading your comments and addressing your questions, so please leave your comments and ratings or questions below!
Leave a Reply