


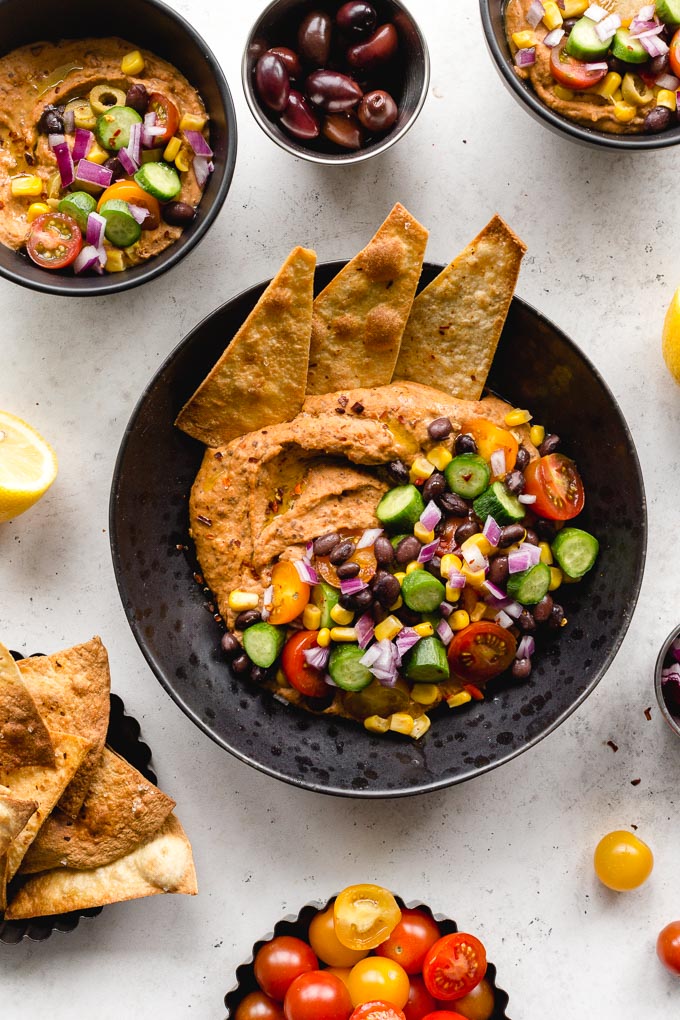
Black Bean Hummus Bowls start with a thick layer of homemade spicy hummus made with black beans and roasted red peppers, and topped off with a pile of fresh veggies and tortilla chips. They're dairy-free and gluten-free, and make a great addition to your meal prep routine.
Want to save this recipe for later?
*This post was originally published in June 2018. It has been updated with new photos and text, including helpful tips for readers. The recipe remains the same. (An original photo is included at the end of this post).
Hummus is a staple in our house. I make a batch almost every Sunday so we have it on hand all week for healthy snacks and lunches. We love it with veggie sticks, pretzels and seeded crackers, but it also makes a delicious spread on sandwiches, wraps and burgers!
And, of course, we love it in these loaded veggie hummus bowls with air fryer tortilla chips or pita chips!
Why you'll love these hummus bowls
- Easy to assemble: Once the hummus is made, these bowls come together quickly. (And the hummus is pretty simple to make too!)
- Meal prep friendly: The hummus lasts for 4-5 days, so you can make it ahead and just assemble your bowls when ready to eat. They also last fully assembled in the refrigerator for a few days.
- Customizable: You can pair the hummus with whatever toppings you like and make these bowls your own. I've included plenty of topping suggestions below.
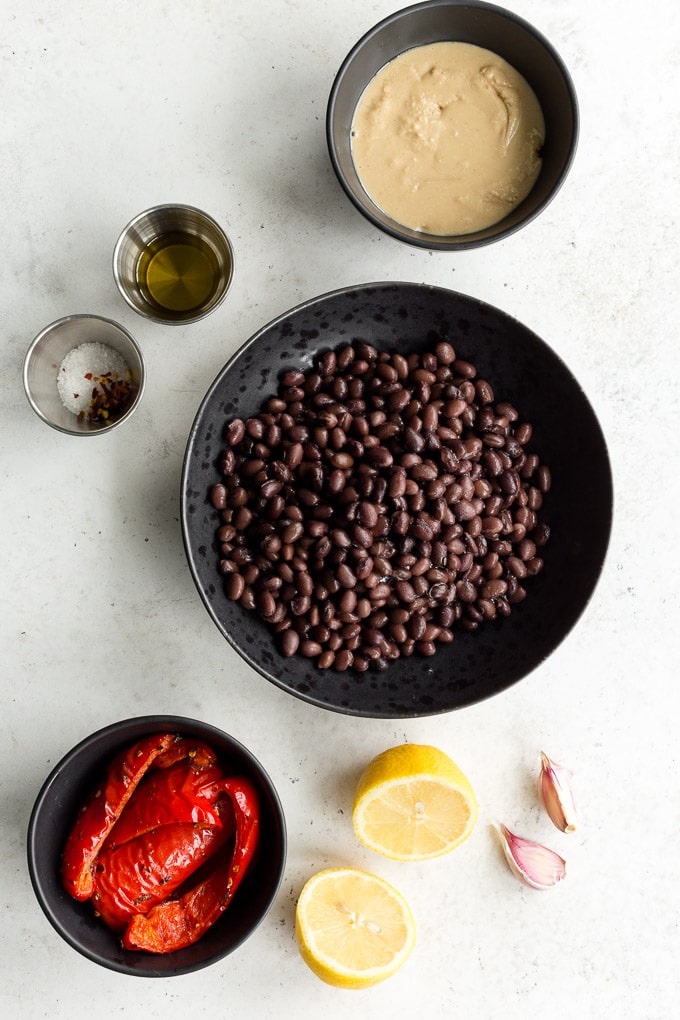
What you'll need
- No salt added black beans
- Red pepper for roasting (or a jar of roasted red peppers, drained)
- Tahini
- Lemon juice
- Garlic
- Extra virgin olive oil
- Crushed red pepper flakes
- Salt and black pepper
How to make black bean hummus with roasted red peppers
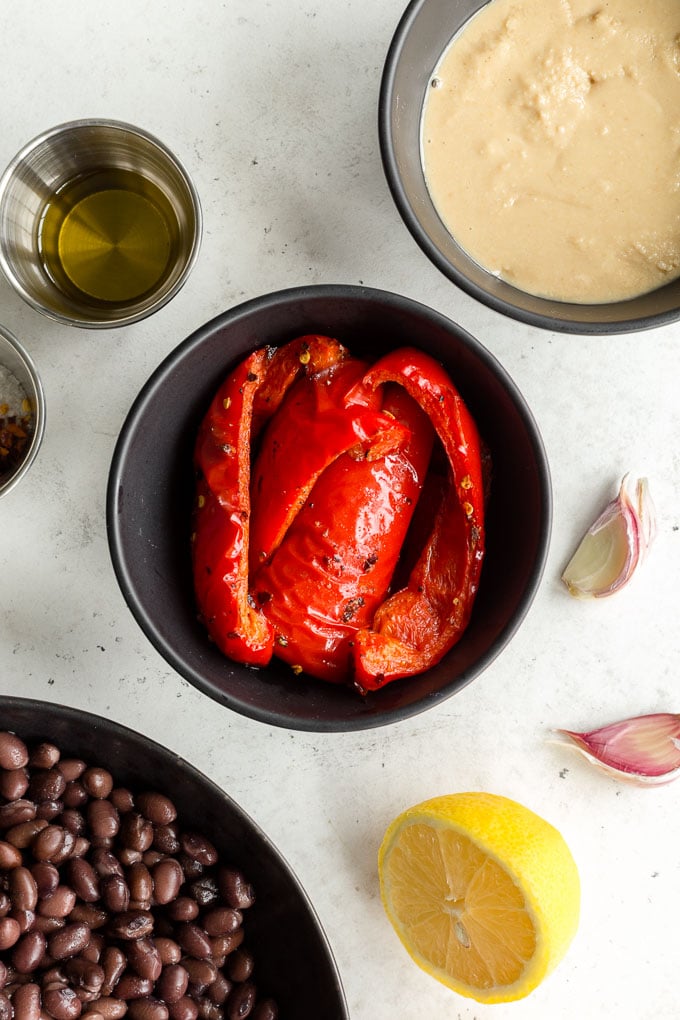
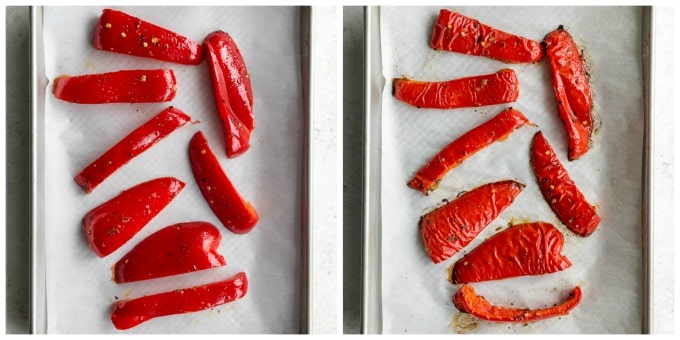
- Step 1: While you can use a jar of roasted red peppers, I like to roast my own. To do this, just cut a large red pepper into slices and toss with some oil, crushed red pepper flakes, salt and pepper.
- Step 2: Place on a baking sheet lined with parchment paper and roast for 20-25 minutes, or until they start to char and blister a bit. Remove from oven and let cool slightly.
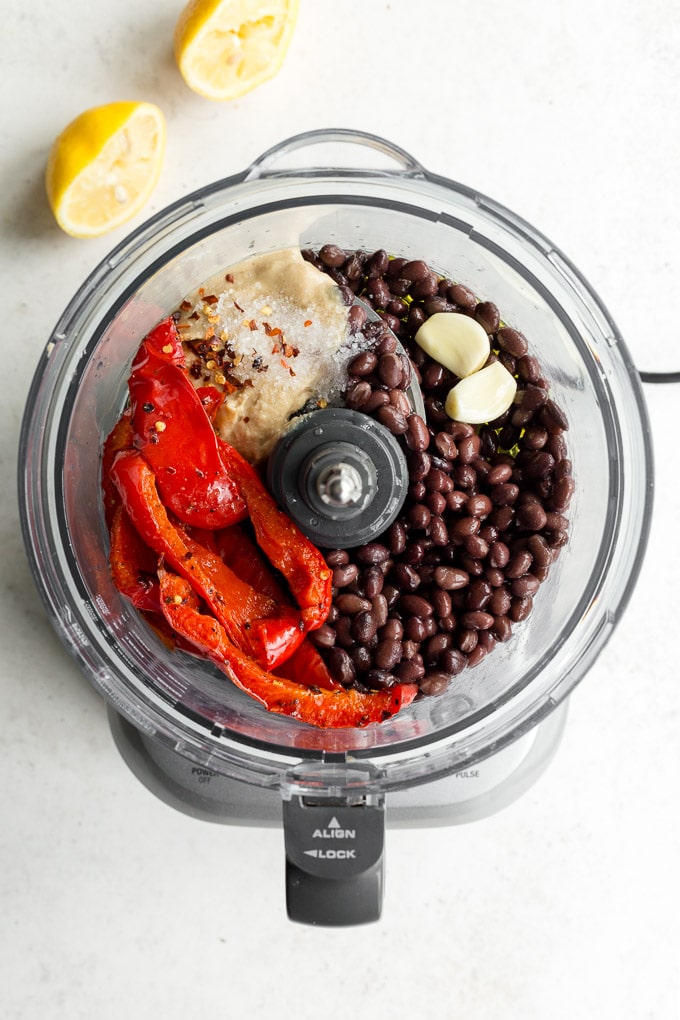
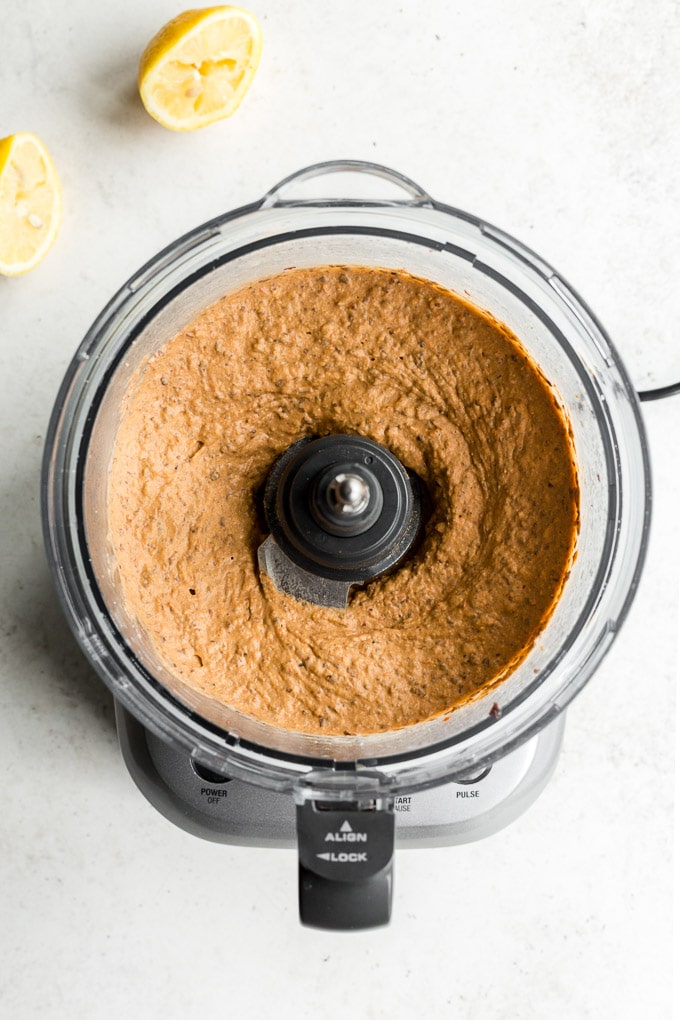
- Step 3: In a food processor bowl, add the red peppers, black beans, tahini, lemon juice, garlic, oil and seasonings, and process on high until creamy. You will need to stop a few times to scrape down the sides of the bowl.
Ways to top homemade hummus bowls
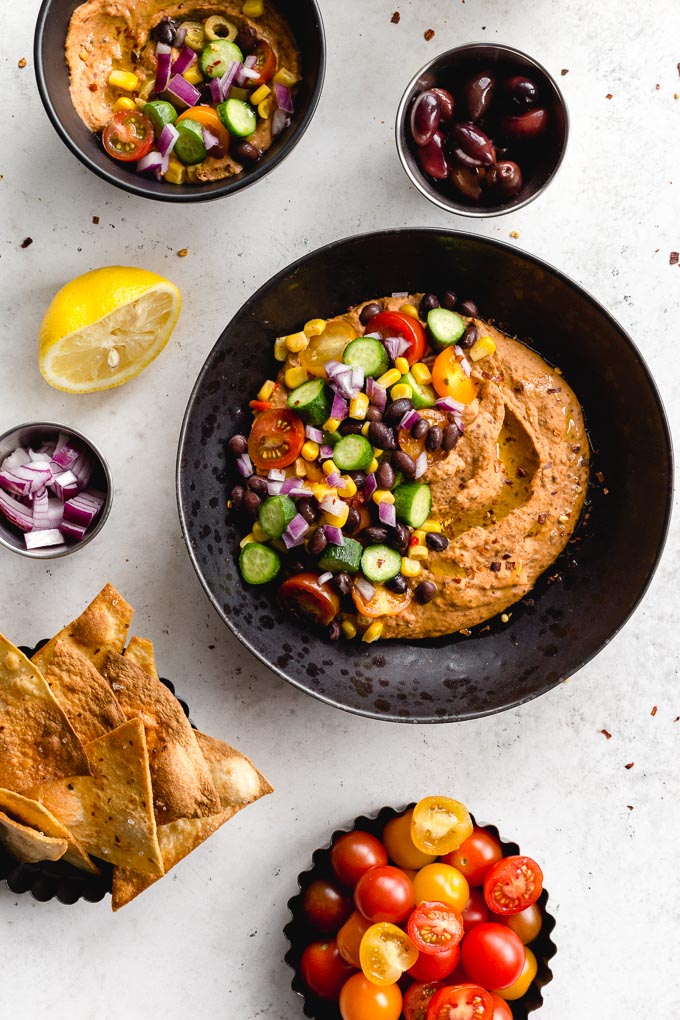
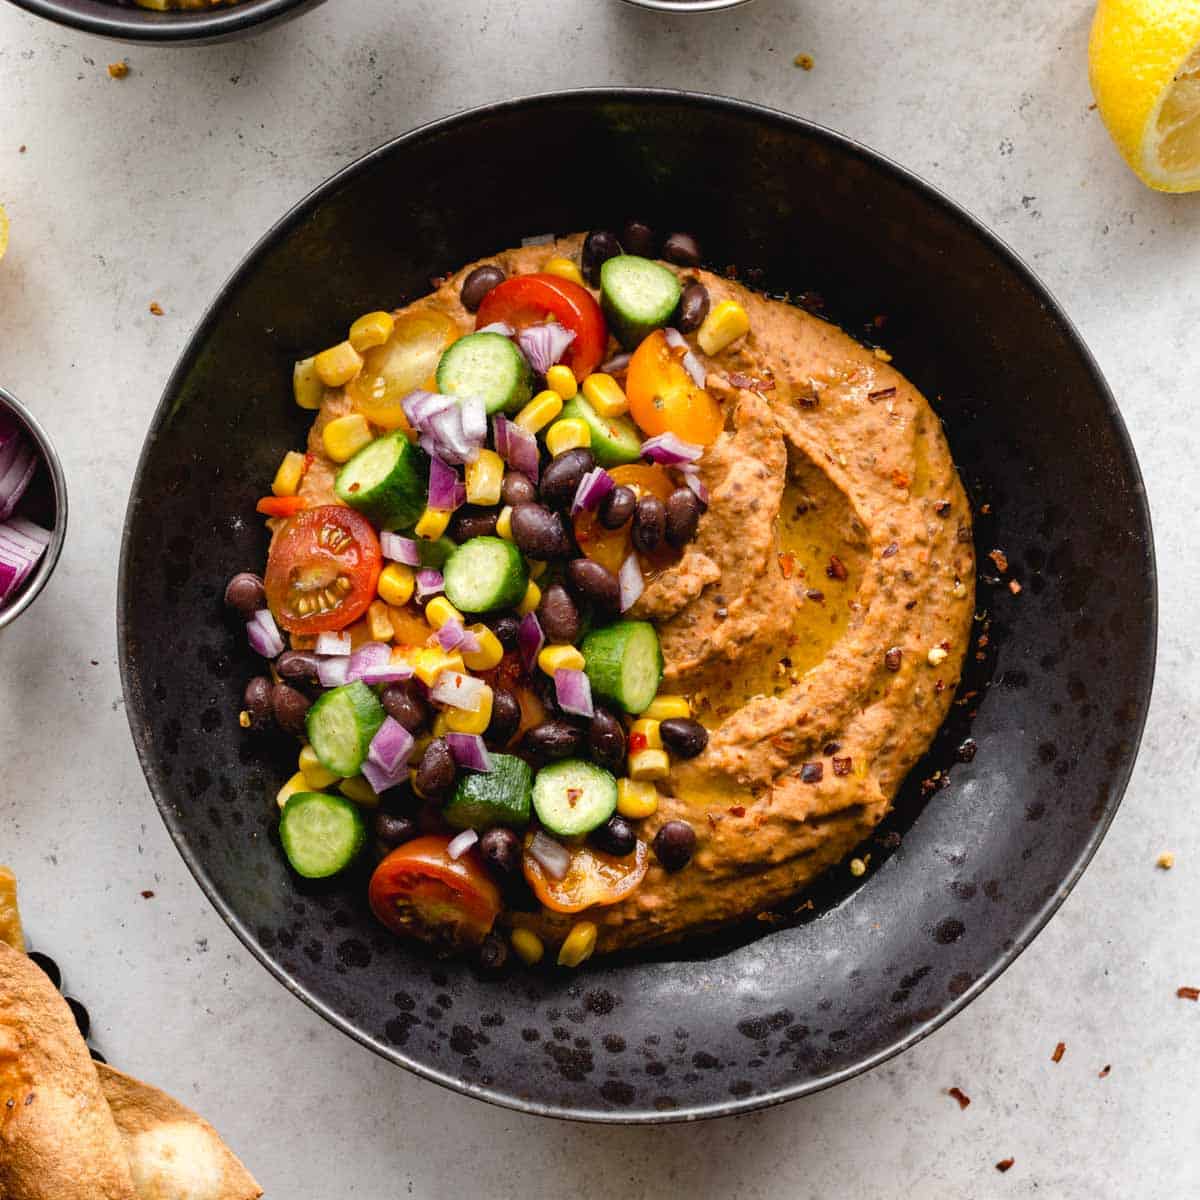
For these particular bowls, I added some reserved black beans, canned corn, olives, red onion, tomato, cucumber and a few tortilla chips. I usually add spinach or arugula, and more veggies than pictured here, but I wanted the photo to show the hummus. Feel free to pile on the veggie toppings!
Some other delicious toppings you can try include avocado, green peppers, green onions, zucchini, carrots, micro greens, nuts, seeds, quinoa or lentils. Essentially, whatever you would add to a salad or grain-bowl, you can add to these hummus bowls.
I also like to drizzle a little oil on top just before serving, along with another squeeze of lemon juice and a sprinkle of red pepper flakes. But that's totally optional.
Frequently asked questions
Divide the hummus into four glass containers with lids. Prepare your desired toppings and place them on top of the hummus (except the tortilla chips). Cover and store in the refrigerator. If you're not going to enjoy these bowls within 2-3 days, just store the hummus separately and add the toppings when ready to eat.
If stored properly, the black bean hummus should last 4-5 days. While you can assemble these bowls 2-3 days in advance, any longer than that and I would wait to add the toppings to the hummus.
You can, but I don't usually do it as I find hummus doesn't have the same texture after it's frozen and thawed.

Additional recipe tips and substitutions
- Be sure to roast the peppers skin side up. I don't normally remove the skins from the peppers but if you want to, just let the peppers cook and blister a little longer. You should be able to lift the skins right off.
- For a short cut, you can use a jar of roasted red peppers. I used a 370 ml jar of flame roasted peppers and just drained them. You end up with a few more red peppers in the hummus, and the hummus isn't quite as thick, but it still tastes great.
- If you like things a little less spicy, just reduce the amount of crushed red pepper flakes you add to the recipe.
- I used no salt added black beans in this recipe. If your beans have salt added, you might want to reduce the amount of salt you add to the hummus.
- If you're meal prepping this recipe, you'll get enough hummus for about 4 bowls. Feel free to use more or less toppings to suit your appetite.
- To keep these bowls gluten-free, make sure your tortilla chips are gluten-free.
- You can also serve this hummus bowl as an appetizer by serving it in a large bowl with all the toppings piled on. Just don't forget the chips and pretzels for dipping!
More hummus and dip recipes
- Roasted Beet Hummus
- Roasted Red Pepper Dip
- Creamy Herb Dip
- Arugula Hummus
- Chipotle Dip
- Edamame Hummus
If you make this recipe, I'd love to hear what you think in the comments below!
HUNGRY FOR MORE? Sign up for our newsletter and follow Crumb Top Baking on Instagram, Pinterest and Facebook!
If you make this recipe, please leave a review and rating below to let me know what you think. If you have a question, drop that below too!
📖 Recipe
Black Bean Hummus Bowls
Ingredients
For the roasted red peppers:
- 1 large red bell pepper, seeded and sliced
- ½ tablespoon extra virgin olive oil
- ¼ teaspoon crushed red pepper flakes
- ⅛ teaspoon kosher salt
- ⅛ teaspoon ground black pepper
For the hummus:
- 1 can (540 ml) black beans, no-salt added, drained and rinsed, (reserve 3 tablespoons for the topping)
- ½ cup tahini
- 1 lemon, juiced
- 2 cloves garlic
- 1 tablespoon extra virgin olive oil
- 1 teaspoon kosher salt
- ¼ teaspoon crushed red pepper flakes
Toppings:
- 1 cup grape or cherry tomatoes, halved
- ½ cup corn, canned or fresh
- ½ cup diced red onion
- ½ cup chopped cucumber
- ¼ cup sliced olives, black or green
- 3 tablespoons black beans, reserved from the hummus recipe
- 2 cups gluten-free tortilla chips
Instructions
- Roast the red peppers: Pre-heat oven to 400F and line a baking sheet with parchment paper. Toss the red pepper slices with the oil and seasonings, and arrange skin side up on the baking sheet. Roast for 20-25 minutes, or until they start to char and blister. Remove from oven and let cool slightly.
- Prepare the black bean hummus: Add the roasted red peppers and all of the hummus ingredients to a food processor bowl and process on high until creamy. You will need to stop a few times to scrape down the sides of the food processor.
- Assemble the hummus bowls: Divide the hummus into 4 bowls and layer on the toppings. Cover and store in the refrigerator, and enjoy within 2-3 days.
Notes
- You can use more or less toppings to suit your hunger level. I usually add spinach or arugula, and more veggies than pictured here, but I wanted the photos to show the hummus.
- Other topping options include avocado, green peppers, green onions, zucchini, carrots, micro greens, nuts, seeds, quinoa or lentils.
- If you're not going to enjoy these bowls within 2-3 days, just store the hummus separately and add the toppings when ready to eat. The hummus will last for 4-5 days in the refrigerator.
Want to save this recipe for later?
Nutrition Facts per Serving
Disclaimer
Nutrition information is an estimate only and will vary depending on the substitutions made and the brands used.
Did you make this recipe or have any questions?
I love reading your comments and addressing your questions, so please leave your comments and ratings or questions below!


Haylie / Our Balanced Bowl says
You know I'm a sucker for a loaded bowl, Leanne! I am loving all of the flavors in this hummus bowl - and the textures too! I can't wait to give it a try! Happy weekend 🙂
Leanne says
Thanks Haylie! Hope you get a chance to try it!
Mary Ann | The Beach House Kitchen says
I LOVE homemade hummus Leanne. And I'd enjoy these bowls for lunch, dinner or snacking! Pinned!
Leanne says
Thanks Mary Ann! Definitely great for a meal or a snack!
Katerina | Once a Foodie says
I love the flavours in this dip, Leanne, and how clever is the idea of topping the dip with a pile of fresh veggies and tortilla chips! This has party food written all over it. Thanks so much for sharing!
Leanne says
Thanks Katerina! Totally a good option for a get together!
Tasia ~ two sugar bugs says
Hummus is one of my favorite lunchtime and snack time treats. 99% of the time I make it from scratch, but I've never done it with black beans. I have all the ingredients in my kitchen so you can bet I'll be making this one this week. CANNOT wait, as I know it's going to be delish!! Thanks Leanne for another fabulous recipe!
Leanne says
Thanks so much Tasia! I hope you get a chance to make it. Hummus with black beans is definitely worth a try!
Alex says
So delicious and nutritious - I love this SO much, Leanne! My kind of food 🙂
Leanne says
Thanks Alex!
Christine says
I went to print this and the ridiculous icons are in the way, covering up the left side of the recipe. The FB, P, Yum, etc.
Yes, it prints with it. How dumb!
Leanne says
Thanks for letting me know. It's fixed now and should print properly.
PShook says
Just discovered this site and LOVE it!!! Will try this recipe this week......Thank you!
Leanne says
Thank you! Happy you found the site and hope you enjoy the hummus!
camila says
I just printed this recipe because I am making it this week!!
Leanne says
Thanks Camila! Let me know what you think when you make it!
Jessica says
What a beautiful recipe for the summertime! I absolutely love 'bowls' for lunches and this is such a great, new option - thanks for sharing!
Leanne says
Thanks Jessica! I love bowls for lunch too! They are so perfect for meal prep! Hope you're having a great week!